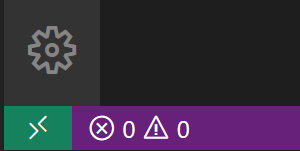
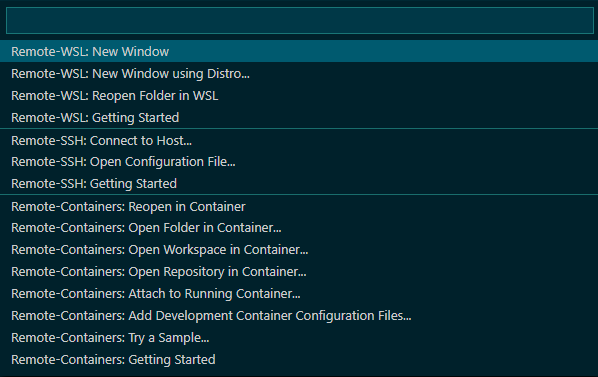
Loading... ## 前言 最近尝试使用了 Windows Terminal 和 WSL,同时安装了许久的 remote development 扩展也终于尝试着用了起来。遂对 Windows Terminal、WSL、VSCode+Remote Development 等配置内容进行一个简单的记录,方便自己换环境时快速恢复。 ## WSL 因为自己平时使用的 VPS 都一直采用的是 Debian,所以 WSL 我也就继续使用 Debian 了。安装比较简单,开启 Linux 子系统功能后 Windows 应用商店下载就好了。 ### 文件权限 WSL 访问 Windows 盘符下的文件时,显示的权限都是 `777`,同时,WSL 新建的文件夹权限也是 `777`,需要稍微修改下更改下默认的权限。 ```bash # 新建 /etc/wsl.conf 文件 [automount] enabled = true root = /mnt/ options = "metadata,umask=22,fmask=111" mountFsTab = true #[filesystem] #umask = 022 # 新建 /etc/fstab 文件,挂载 c 盘,以使用 Windows 下的应用程序 C:\ /mnt/c drvfs rw,noatime,uid=1000,gid=1000,metadata,umask=22,fmask=11 0 0 # zsh 配置好后,在 .zshrc 文件中添加 if [[ "$(umask)" == '000' ]]; then umask 022 fi ``` ### 常用配置 - 基础软件 ```bash sudo apt install vim git curl ``` - shell 配置(oh-my-zsh) - shell:zsh (oh-my-zsh) - prompt: [pure](https://github.com/sindresorhus/pure) - plugin: `git z zsh-autosuggestions zsh-syntax-highlighting` ```bash # 安装 zsh sudo apt install zsh # 安装 oh-my-zsh 并启用 sh -c "$(curl -fsSL https://raw.github.com/ohmyzsh/ohmyzsh/master/tools/install.sh)" # 下载插件 # > zsh-syntax-highlighting git clone https://github.com/zsh-users/zsh-syntax-highlighting.git ${ZSH_CUSTOM:-~/.oh-my-zsh/custom}/plugins/zsh-syntax-highlighting # > zsh-autosuggestions git clone https://github.com/zsh-users/zsh-autosuggestions ${ZSH_CUSTOM:-~/.oh-my-zsh/custom}/plugins/zsh-autosuggestions # 下载 pure prompt mkdir -p "$HOME/.zsh" git clone https://github.com/sindresorhus/pure.git "$HOME/.zsh/pure" # 修改 ~/.zshrc # > 添加 pure path fpath+=$HOME/.zsh/pure # > 修改主题为 '' ZSH_THEME="" # > 使 pure 生效,添加在 source $ZSH/oh-my-zsh.sh 后 autoload -U promptinit; promptinit prompt pure # > 添加插件 plugins=(git z zsh-autosuggestions zsh-syntax-highlighting) ``` - `python` 环境配置 ```bash # 系统 python 环境 sudo apt install python3 python3-pip ln -s /usr/bin/python3 /usr/bin/python # 安装 pyenv git clone https://github.com/pyenv/pyenv.git ~/.pyenv echo 'export PYENV_ROOT="$HOME/.pyenv"' >> ~/.zshrc echo 'export PATH="$PYENV_ROOT/bin:$PATH"' >> ~/.zshrc echo -e 'if command -v pyenv 1>/dev/null 2>&1; then\n eval "$(pyenv init -)"\nfi' >> ~/.zshrc # 安装 pipenv pip3 install pipenv / sudo apt install pipenv ``` ## Windows Terminal 暂时未对 Windows Terminal 进行过多的自定义,默认的英文字体挺满意的,整体也很简洁,暂时不想过多折腾了。 profiles 创建示例 (WT 下拉栏选择**设置**进行编辑): ```json { // guid 需唯一 "guid": "{b453ae62-4e3d-5e58-b989-0a998ec441c5}", "hidden": false, "name": "Ubuntu-10.180.8.24", // 使用 SSH Keys 登录,避免输入密码 "commandline": "ssh root@10.180.8.24 -i C:\\users\\withdewhua\\.ssh\\id_rsa", // 强制使用自定义的 tab title "suppressApplicationTitle": true } ``` ## Remote Development vscode 扩展商店搜索安装即可,安装后左下角可看到远程状态栏:  点击可看到具体的连接选项:  ### Remote WSL 两种打开方式: 1. 在 vscode 中直接连接 wsl(即图中的 Remote-WSL) 2. 在 wsl 下,使用命令 `code` 打开 ### Remote SSH 在 vscode 中通过 Remote-SSH 进行配置和连接,可配置使用密钥登录,避免输入密码: ```bash # SSH configuration file Host 10.180.10.200 HostName 10.180.10.200 User root ForwardAgent yes # 指定私钥文件路径 IdentityFile C:\Users\withdewhua\.ssh\id_rsa ``` ## 参考 - [WSL 使用中遇到的问题及解决方案 #2 - DrvFs 文件系统权限问题](https://p3terx.com/archives/problems-and-solutions-encountered-in-wsl-use-2.html) - [Windows Terminal Tab Title Setting](https://docs.microsoft.com/en-us/windows/terminal/tutorials/tab-title) 最后修改:2021 年 06 月 06 日 © 允许规范转载 赞 0 如果觉得我的文章对你有用,请随意赞赏